Introduction
Welcome to the first part of our LoRaWAN Gateway setup series. In this tutorial, we’ll learn how to flash the operating system (OS) for the RAK2245 Pi HAT on a Raspberry Pi 3B+/4.
The RAK2245 Pi HAT is a LoRaWAN concentrator board that, when combined with a Raspberry Pi, allows you to build a powerful DIY LoRaWAN gateway. This gateway will later run ChirpStack LoRaWAN Server, which enables you to connect LoRaWAN nodes and manage them efficiently.
👉 Full step-by-step video guide is also on YouTube, but keep reading for detailed instructions, screenshots, and troubleshooting tips.
Hardware & Software Requirements
Hardware Needed
- RAK2245 Pi HAT (LoRaWAN concentrator)
- Raspberry Pi 3B+ or Raspberry Pi 4
- MicroSD card (16GB or larger, Class 10 recommended)
- Power supply (5V 3A recommended for Pi 4)
- Internet connection (Ethernet or WiFi)
Software Needed
- RAK2245 OS image (download from RAK official site)
- BalenaEtcher (for flashing SD card)
- ChirpStack LoRaWAN Server (to be installed in next tutorial)
Preparing the Raspberry Pi
- Download the RAK2245 OS image from RAKwireless official resources.
- Insert your microSD card into your computer.
- Optional but recommended: verify the checksum of the downloaded image to ensure integrity.
Flashing the OS (Step-by-Step)
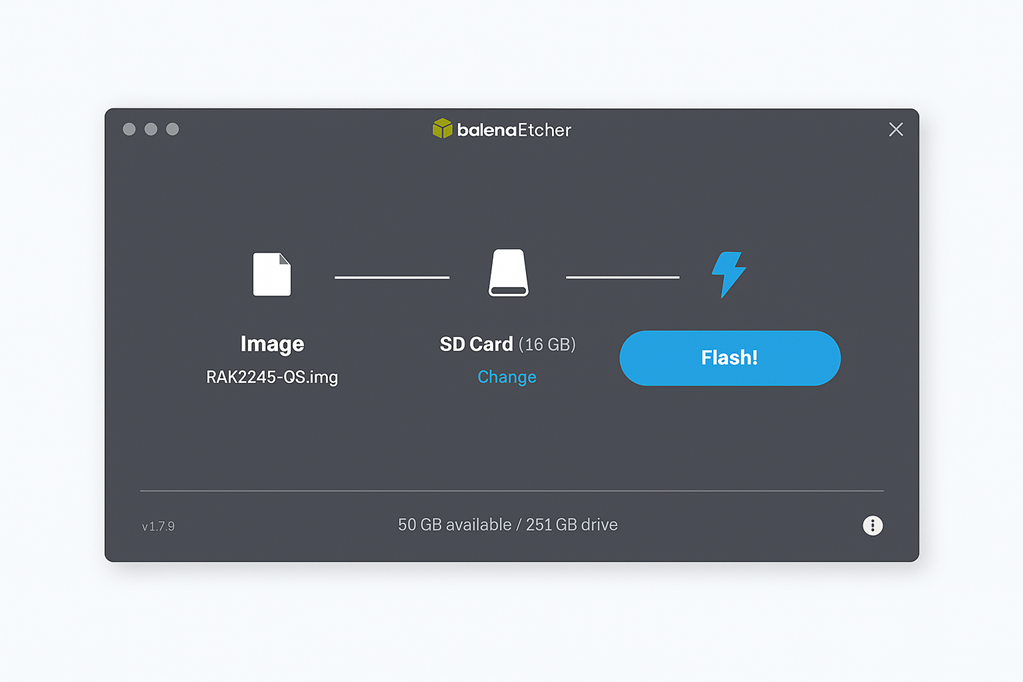
- Install and open BalenaEtcher.
- Click Flash from file → select the RAK2245 OS image.
- Choose your microSD card as the target.
- Click Flash! and wait for the process to complete.
- Insert the SD card into the Raspberry Pi.
- Connect the RAK2245 Pi HAT, power up your Raspberry Pi, and let it boot.
Verifying Installation
- Connect to your Raspberry Pi via HDMI or SSH.
- Ensure the OS boots properly.
- Check that the RAK2245 HAT is detected (using device commands or logs).
- If successful, your Pi is now running the RAK2245 OS.
Preparing for ChirpStack Installation
Now that the base OS is running, the next step will be installing ChirpStack LoRaWAN Server. ChirpStack acts as the backend network server for managing LoRaWAN devices.
👉 Stay tuned for Part 2 of this series where we install and configure ChirpStack on the Raspberry Pi.
Common Issues & Troubleshooting
- Issue: SD card not detected → Solution: Re-flash or use a different card.
- Issue: Pi not powering → Solution: Ensure you’re using a 5V 3A adapter.
- Issue: No network → Solution: Double-check Ethernet cable or WiFi config.
Video Tutorial
Conclusion
We’ve successfully flashed the OS for the RAK2245 Pi HAT on Raspberry Pi 3B+/4. This forms the foundation for building a LoRaWAN gateway, and in the next tutorial, we’ll move on to installing ChirpStack.
📬 Enjoyed this tutorial? Stay updated by subscribing to our newsletter
💬 Got questions or stuck somewhere? Drop a comment below — I’d love to help.